

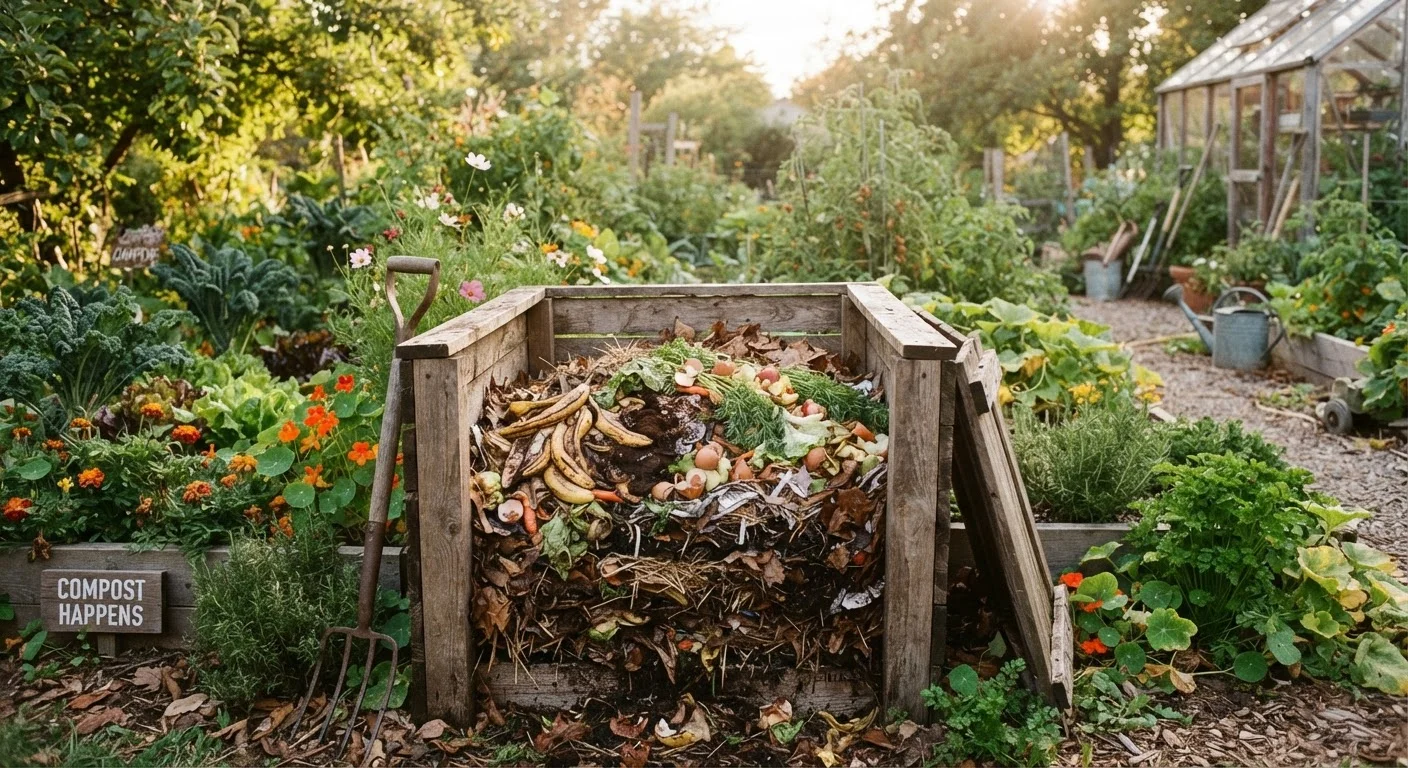
Why Composting Is Worth Starting Today
Composting is one of the highest-return habits a gardener can develop. You take material you'd otherwise throw away - vegetable peels, coffee grounds, fallen leaves - and convert it into a dark, crumbly soil amendment that improves plant health across your entire yard. If you're new to growing things, it pairs naturally with understanding what your soil actually needs. Our guide to soil basics for new gardeners covers how organic matter improves drainage, aeration, and nutrient availability - all things finished compost delivers.
The process is genuinely simple, but it does have a learning curve. This guide walks you through building a pile from nothing, maintaining it through the seasons, and knowing when your compost is ready to use.
What you will need
What Goes In - and What Stays Out
The foundation of composting is balancing two categories of organic material:
- Greens (nitrogen-rich): vegetable and fruit scraps, fresh grass clippings, coffee grounds and filters, tea bags, eggshells, and fresh garden trimmings.
- Browns (carbon-rich): dried leaves, cardboard torn into small pieces, paper bags, straw, sawdust from untreated wood, and dry plant stalks.
A rough target is one part greens to three parts browns by volume. Too many greens and the pile turns slimy and odorous. Too many browns and decomposition stalls.
Foods That Should Never Be Composted
Meat, fish, bones, dairy, and greasy or oily foods should stay out of your home compost bin. They decompose slowly, generate strong odors, and attract rodents and other pests. Diseased plants or those treated with persistent herbicides can introduce problems that survive composting temperatures - bag these and dispose of them with yard waste collection instead.
Never add meat, fish, bones, dairy products, oily foods, pet waste, or plants showing signs of disease or pest infestation. These attract pests, create odors, or can introduce pathogens that survive a home compost pile's temperatures.
How to Build and Maintain Your Compost Pile
Follow the steps below to set up a functioning compost system. Most of the initial work takes under an hour; ongoing maintenance is a matter of minutes each week.
Choose a location and container
Pick a spot that gets partial sun - full shade slows decomposition, full sun dries the pile too quickly. You can use a purchased plastic bin, a simple three-sided wooden frame, or just a freestanding pile. The pile should be at least 3 feet in each dimension to retain enough heat to break down material effectively.
Lay a brown base layer
Start with a four- to six-inch layer of coarse browns - dried leaves, small twigs, or straw. This base layer promotes drainage and airflow from the bottom, which helps prevent the pile from going anaerobic (oxygen-deprived) and smelly.
Add alternating green and brown layers
Add kitchen scraps and fresh clippings in a two- to three-inch layer, then top with a four- to six-inch layer of browns. Continue alternating. Chop or shred materials into smaller pieces when possible - smaller surface area means faster breakdown.
Maintain moisture and aeration
The pile should feel damp like a wrung-out sponge - not dripping wet, not bone dry. Check moisture weekly, especially during dry spells. Use a pitchfork to turn the pile every one to two weeks, pulling material from the outside edges into the center where temperatures are highest.
Stop adding new material when you're ready to finish a batch
Once the pile is full or you want to harvest finished compost, stop adding fresh material and let it cure. Continue turning it occasionally. As decomposition slows and the material becomes uniform in texture, it is nearly ready to use. Sift finished compost through a half-inch screen to remove any large undecomposed chunks - toss those back into your next pile.
As your composting habit develops, you'll likely find yourself generating more finished material than you expect. That's a great problem to have - finished compost can be worked into planting beds, used as mulch, or mixed into containers. For small-space gardeners, our container gardening overview explains how to use amendments effectively in pots and planters.
How to Tell When Compost Is Ready
Finished compost looks, smells, and feels nothing like what you put in. It should be dark brown or nearly black, crumble easily in your hand, and smell earthy - like a forest floor after rain. If you can still identify chunks of the original material, the pile needs more time or turning.
Timeline varies considerably. A hot, actively managed pile can produce finished compost in as little as six to eight weeks. A passive pile left largely undisturbed may take six months to a year. Temperature, moisture, pile size, and how often you turn it all factor in.
To use finished compost, work two to four inches into garden beds before planting, add it as a top-dressing around established plants, or blend it into potting mixes. Incorporating compost into your seasonal gardening routine pays compounding dividends - our seasonal gardening calendar can help you time when to harvest your pile and apply it most effectively.
The content on this site is provided for informational purposes only and should not be considered a substitute for professional advice. While we strive to provide accurate and up-to-date information, we make no guarantees regarding its completeness or accuracy. Always consult a qualified professional for advice specific to your circumstances before making any decisions.